
Stamp Maker
Design and export custom 3D-printable stamps in a browser.
Visit the live app ↗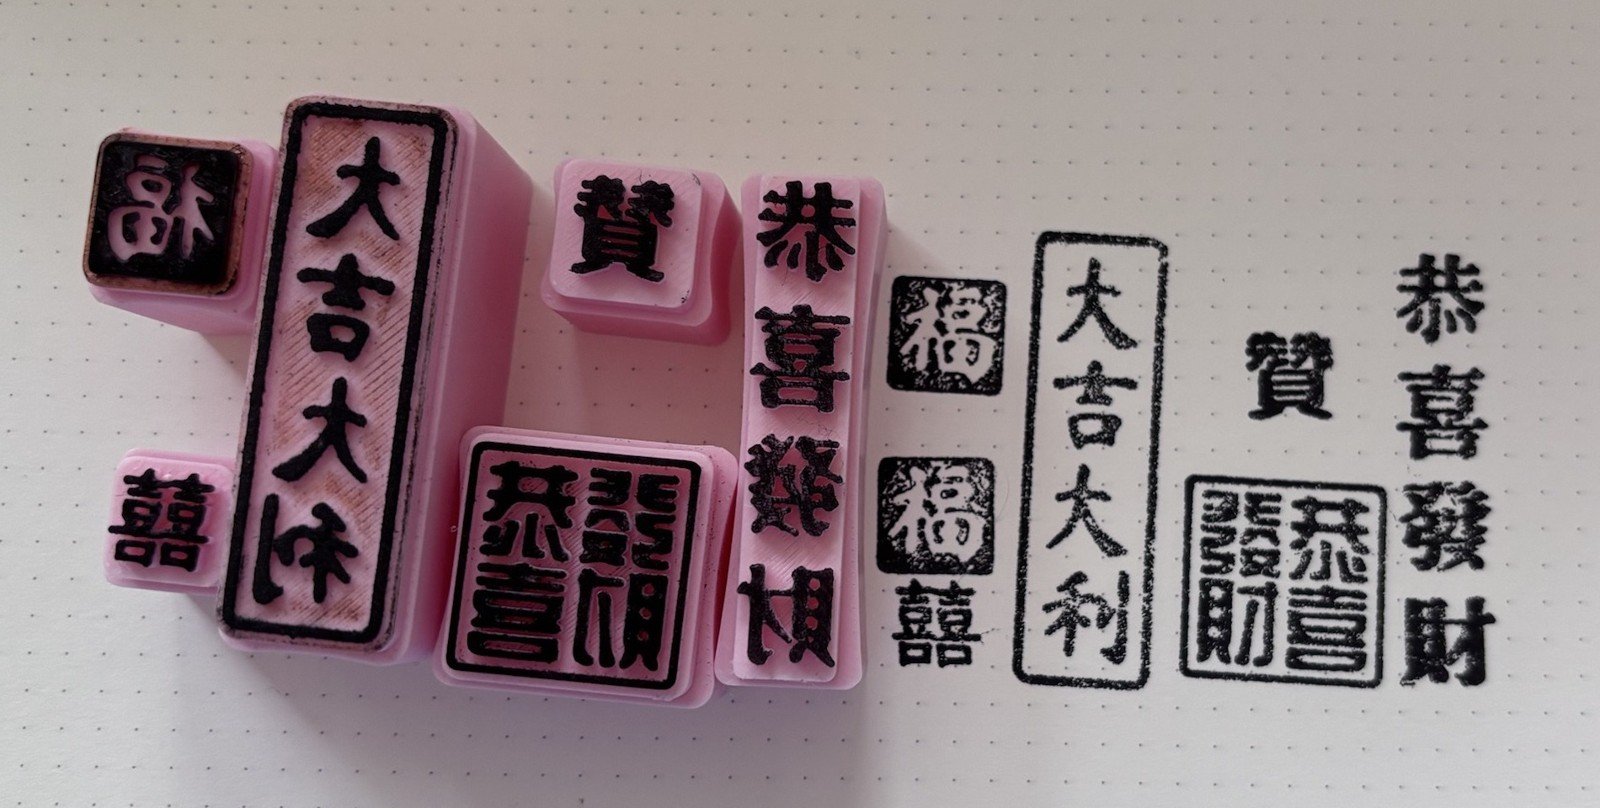
Overview
Users enter text or upload an image, preview the stamp, and download an STL file ready to slice.
The problem
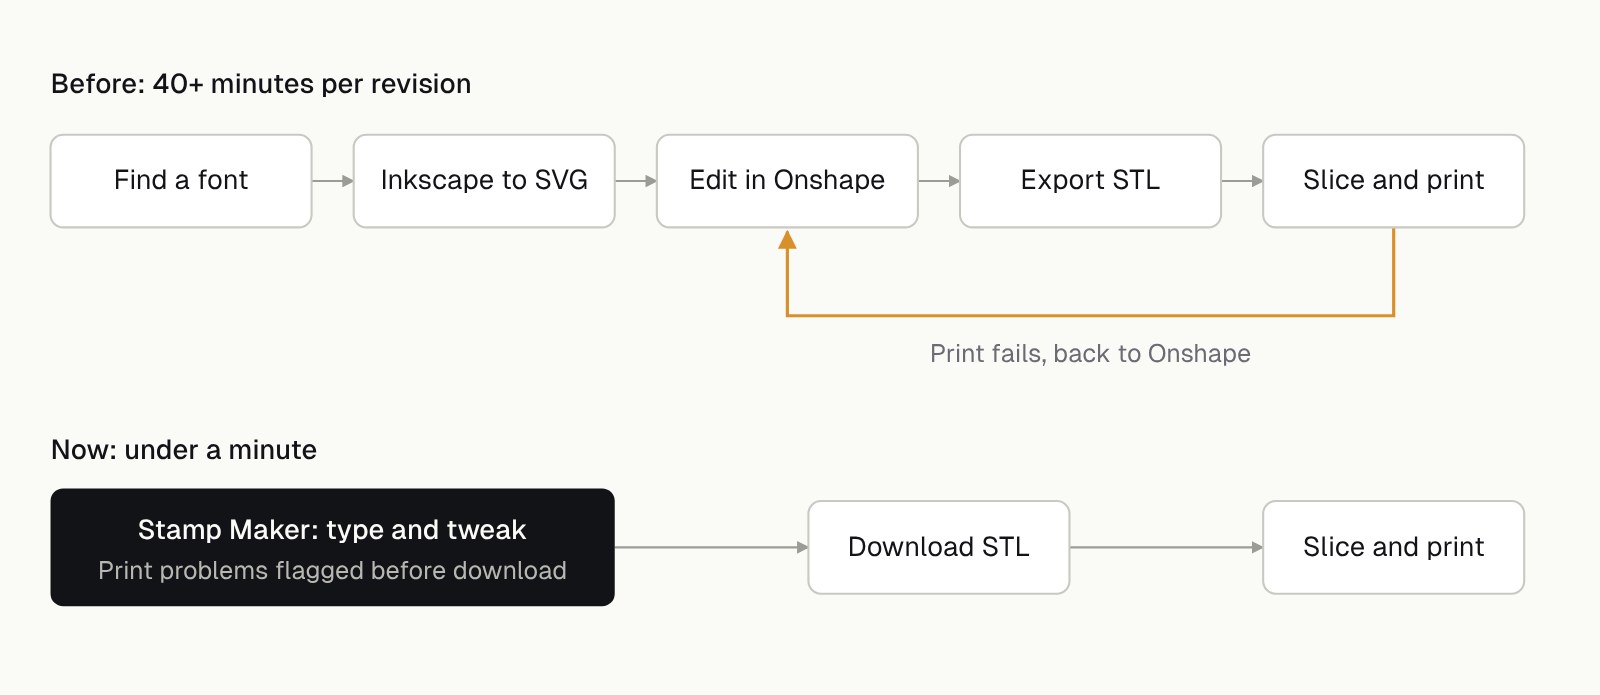
I built Stamp Maker to solve a problem I kept running into. Making or revising a stamp meant choosing a font, modeling it in Onshape, exporting the file, and preparing it to print.
Each revision took at least 40 minutes. If I found a problem, I had to return to Onshape and repeat several steps.
The insight
The hard part wasn't modeling. It was remembering what makes a stamp printable.
My failed prints usually came from details I had to check myself:
- The stamp face needs to be mirrored, or the print reads backwards.
- Poor print orientation can cause sagging or leave marks from supports.
- Thin strokes can break or blur, depending on the nozzle.
- Traditional seal layouts need the right character order and columns.
I built these checks into the tool:
- Set useful defaults. The face is mirrored automatically, and the print orientation is built into each style.
- Show problems early. Strokes that may not print clearly are highlighted before download.
- Explain trade-offs simply. Users can choose between “gentler, easier to print” and “steeper, more compact” without adjusting an unexplained angle.
How it works 1
Preview the stamped result.
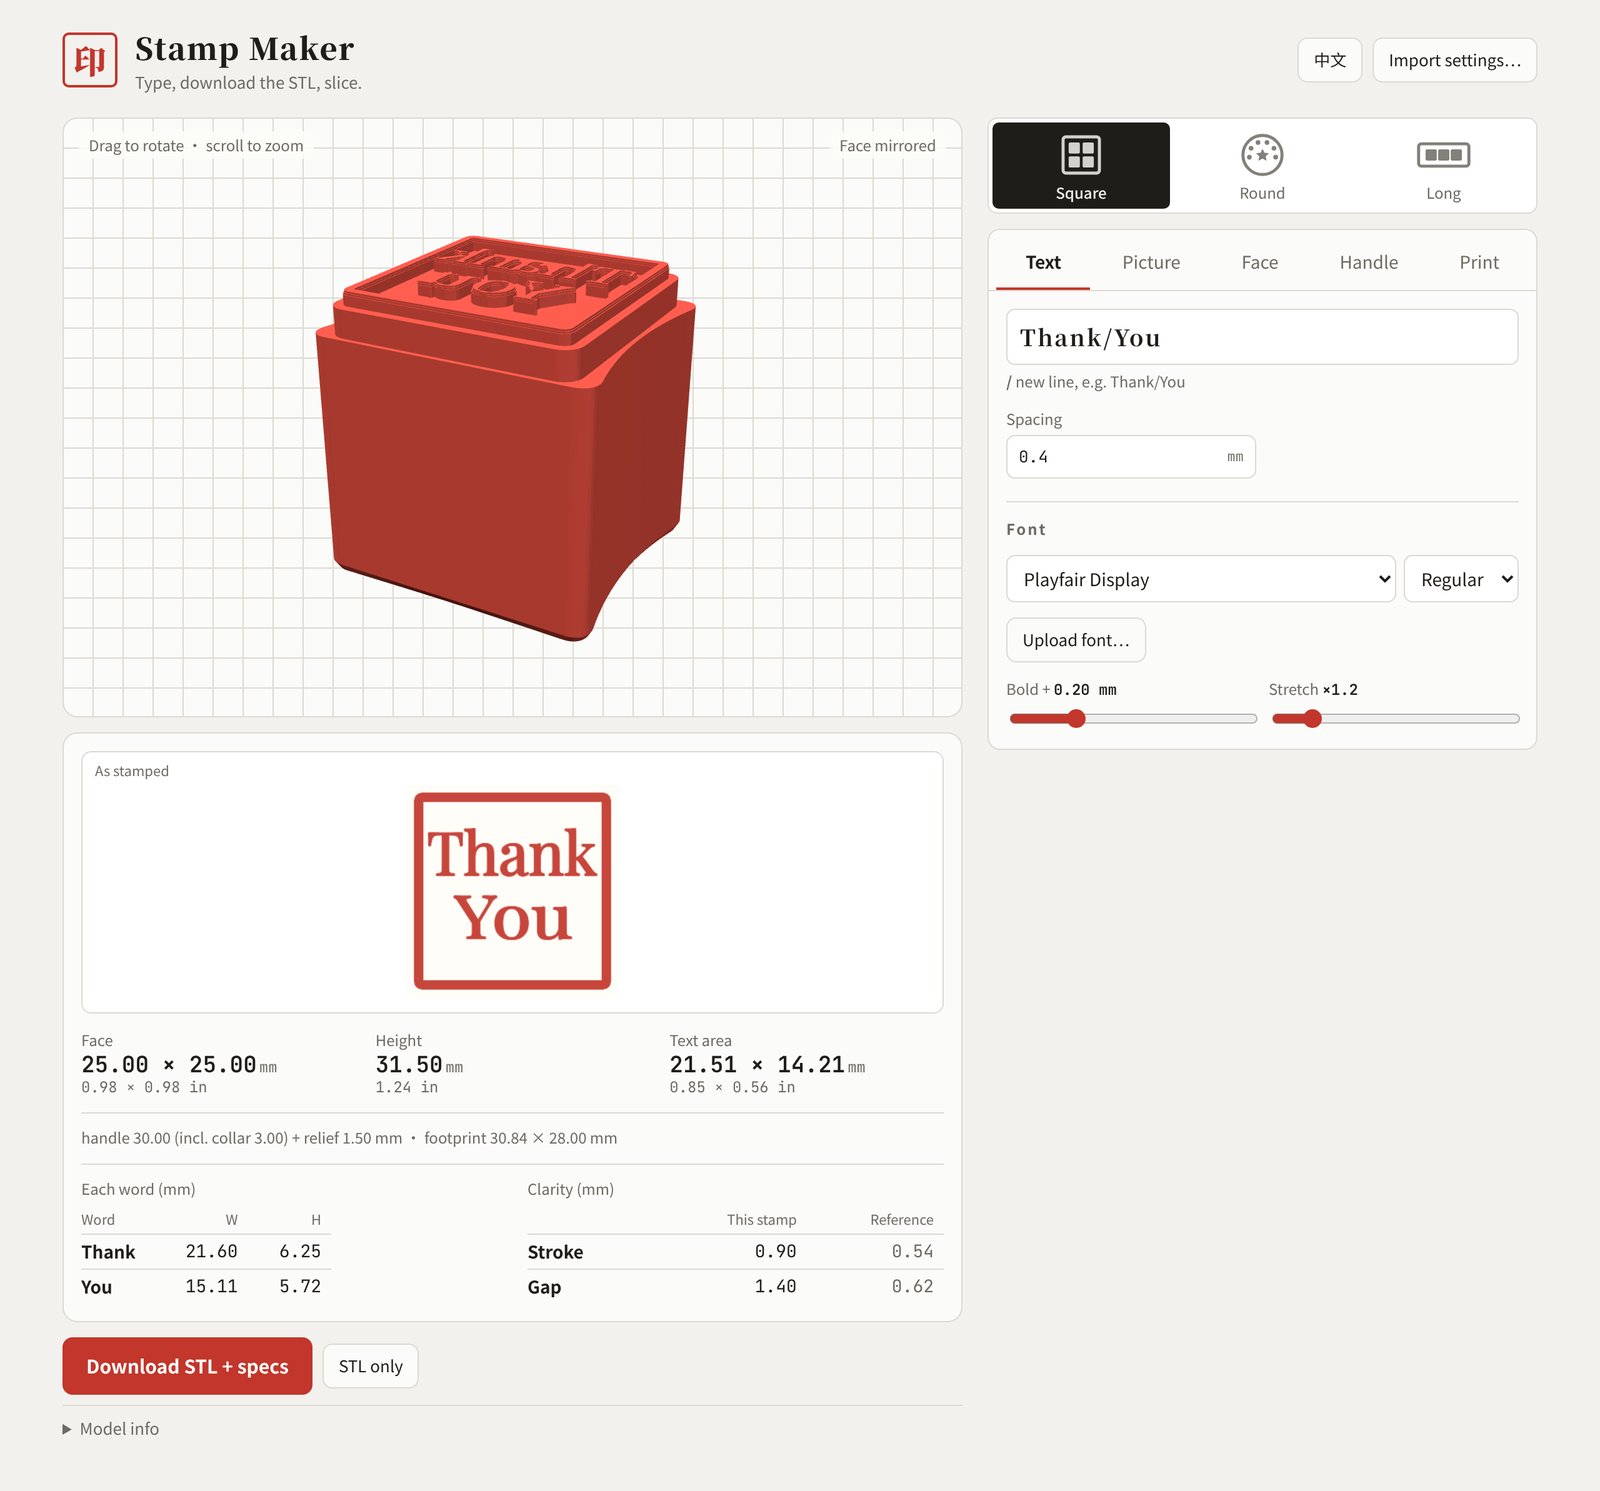
The preview shows how the design will look on paper. The face is mirrored automatically, so users can read the text normally while editing.
How it works 2
Check and fix thin strokes.
Users enter their nozzle diameter. Strokes thinner than the set value turn yellow in the preview. They can use Auto-fix or adjust the Bold+ slider.
A Clarity table compares the stamp's stroke width and gaps with reference values from my Bambu Lab A1 setup. Users can change the nozzle diameter.
How it works 3
Print without supports.
The straight, curved, and tapered handle styles are designed to print face up, with the handle base on the bed, and without supports.
The slim-neck style needs supports because the face extends beyond the handle. The tool tells users this when they select it.
How it works 4
Make stamps from images.
The Picture tab accepts PNG, JPG, and SVG files. Users can make an image-only stamp or combine an image with text. On round stamps, the image can sit in the center with text around it.
Dark areas become raised and carry ink. Users can adjust the darkness threshold or invert the image to raise light areas instead.
The tool warns users when an image may lose detail. High-contrast logos, silhouettes, and line art work best; photos and gradients may print as a blur.
Uploaded images are saved in the browser and included in the settings file, so users can reopen a project and keep editing.
More features
Users start by choosing a Square, Round, or Long stamp. Settings are grouped into Text, Picture, Face, Handle, and Print tabs. Labels describe how a setting affects the grip or print, rather than using technical curve terms.
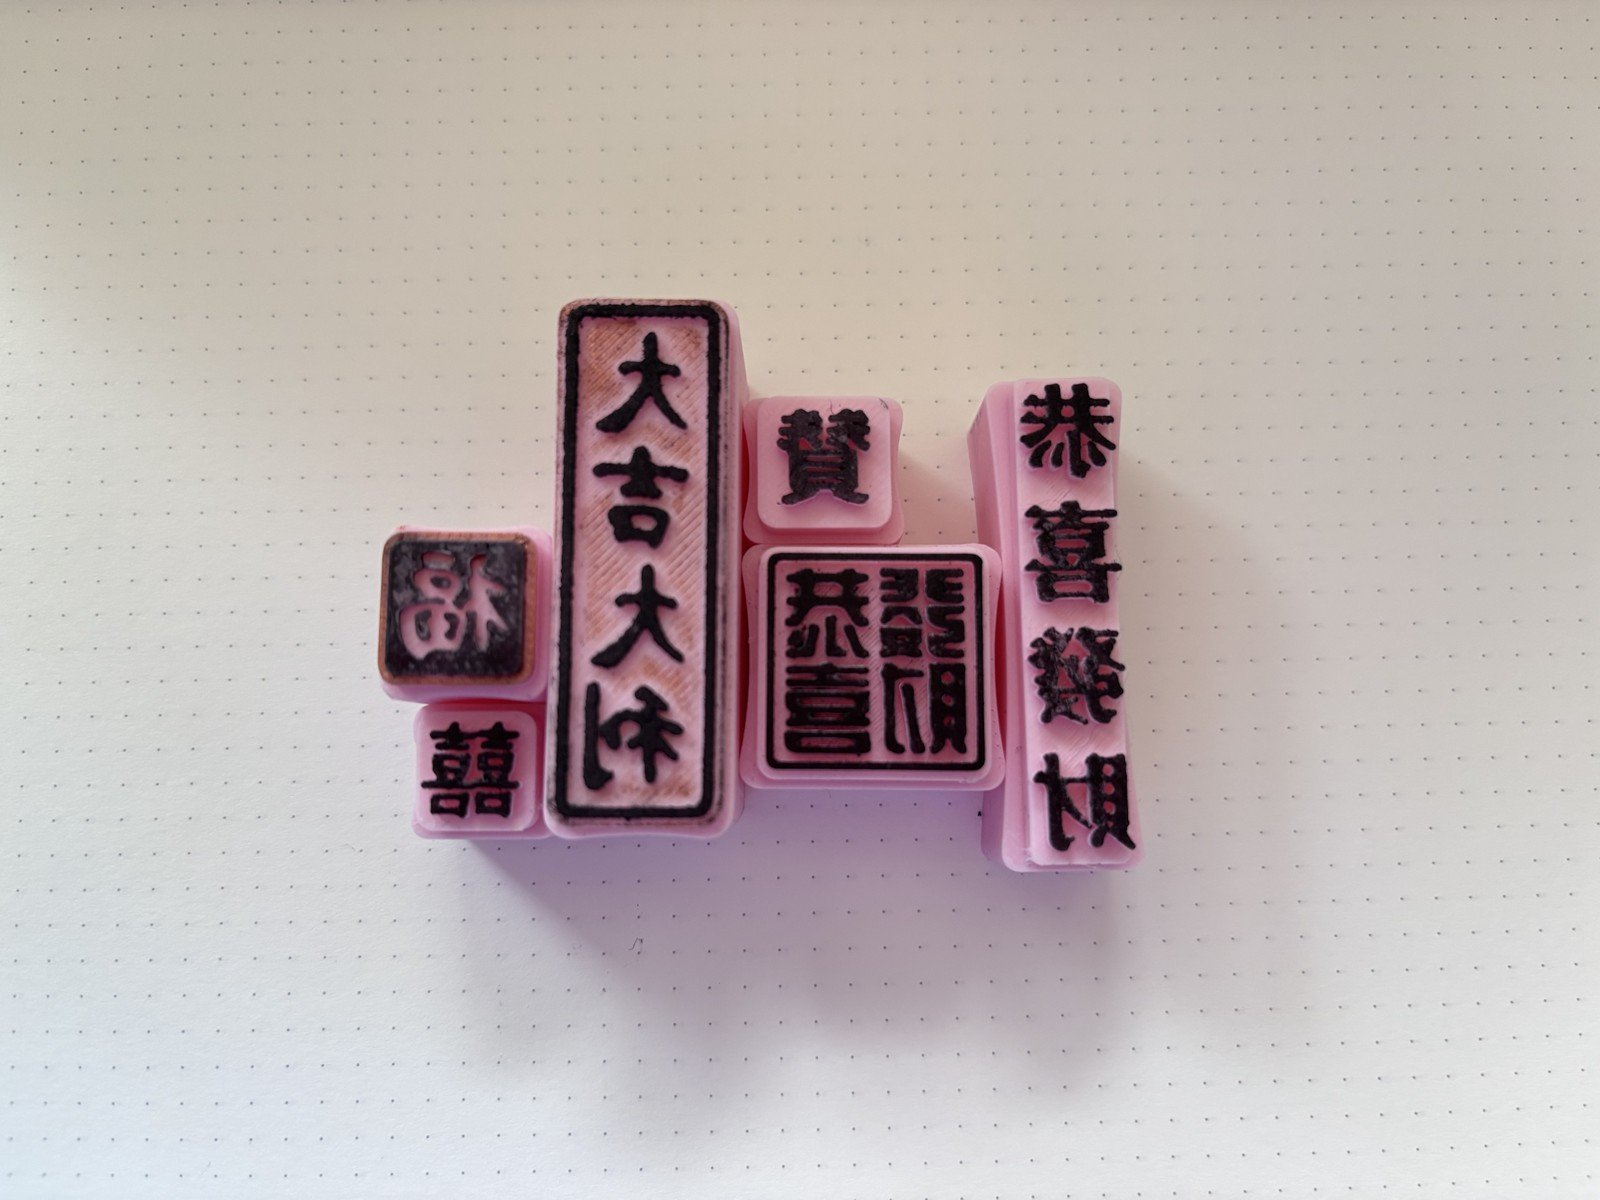
The tool also supports traditional Chinese seal layouts. Users can split text into columns with “/”, convert between Simplified and Traditional Chinese, and upload seal-script fonts. The interface is available in Chinese and English.
For sellers
I also considered people who sell custom stamps online. They may need to make a new design for each order and prepare details for an online listing.
The download is a ZIP file with the STL, a spec card image, Chinese and English listing text, and a settings file for future edits.
Outcome
A revision that used to take 40 minutes or more now takes under a minute.
In my old workflow, every revision meant returning to CAD and repeating several steps. With Stamp Maker, I can change the design and export a new STL in one place. In one screen recording, the edit-to-download flow took about 26 seconds.
Examples
The examples below show stamps made with different shapes, sizes, and fonts.
What's next
- Reduce the number of settings. The tool has more than twenty controls. I'd like to make more of them automatic based on stamp size.
- Check more print risks. Text that is too small or a border that is too thin can still be hard to judge. A pre-print check could bring these warnings together.
- Support more machines and processes. The current reference values are based on my Bambu Lab A1 and PLA. Other printers and tools, such as engraving machines, have different limits and file formats. A future version could use the selected machine to set its checks and export format.